Restoring a Database Using a Temporary Instance
Summary

Data in your database will unavoidably grow with changes to your business and the elapse of time. Alibaba Cloud ApsaraDB for RDS provides a very stable data backup mechanism. Data backup may still be lost in actual operations due to maloperation or other reasons. By creating a temporary instance to restore database to a time point, a feature provided by RDS, you can retrieve data more easily.
When you experience data loss while using an ApsaraDB for RDS instance, do not use a backup to perform an overwriting restoration operation unless you are certain that the data in the backup is sufficient to meet your requirements. After you directly use the backup set to overwrite and restore the instance, usually you will be unable to create a temporary instance in the console for the maloperation time point. Therefore, we recommend you restore the instance by creating a temporary instance at a time point.
ApsaraDB for RDS offers two data restoration solutions as follows respectively:
Solution 1: The data at the time point is able to meet business requirements and data at that time point can be directly used to overwrite the target database (or the target table).
Step 1: Create a temporary instance
Step 2: Select to create a temporary instance by time and specify a time point.
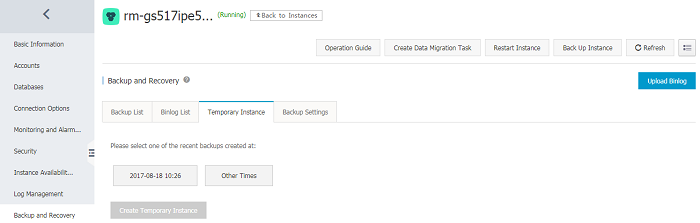
Note: There are two conditions for creating a temporary instance. 1. There is a full backup before the time point; 2. No instance restoration (overwriting restoration) operations are performed during the time period between the two adjacent backup sets before and after the specified time point.
After specifying the date and time, click Create Temporary Instance, and refresh the current page:
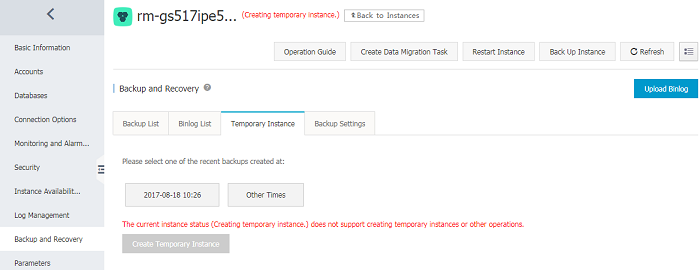
You can check the progress of the created task in the upper right corner:

Note: Creating a temporary instance usually requires the incremental data starting from the backup time point of the app. Therefore, if the incremental data size between the specified time point and the backup time point is large, or if the instance data size is large, it may take a long time for creating the temporary instance. Wait in patience.
Step 3: After the task is completed, refresh the page:
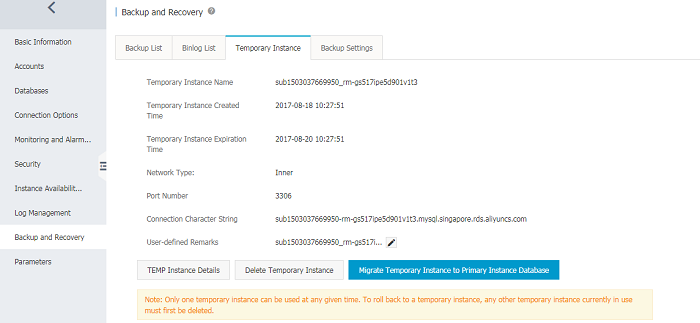
If the data at the time point can meet business requirements (the normal incremental data after the time point can be discarded), you can directly click the "Migrate Temporary Instance to Master Instance Database" button to migrate the database (or alarm table) from the temporary instance to the master instance via the DTS tool (you can ignore Step 4 and its subsequent steps).
Solution 2: It is required to keep the normal record changes in the target database (or the target table) after the maloperation time point, and restore the deleted records.
The first three steps are the same as those in Solution 1. After the temporary instance is created:
Step 4: Retrieve the data that was accidentally deleted and keep incremental data as appropriate.
Click the button in red to check temporary database information,
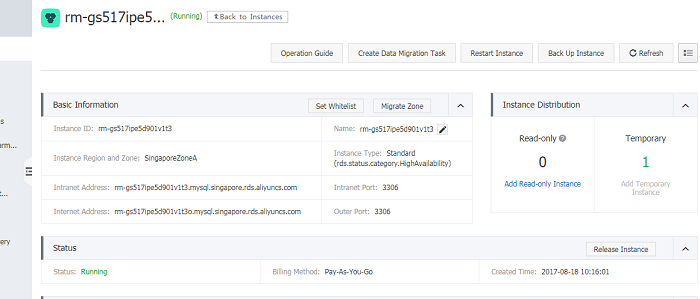
Check the temporary database information
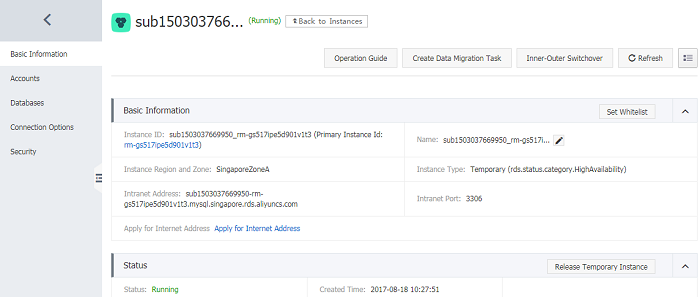
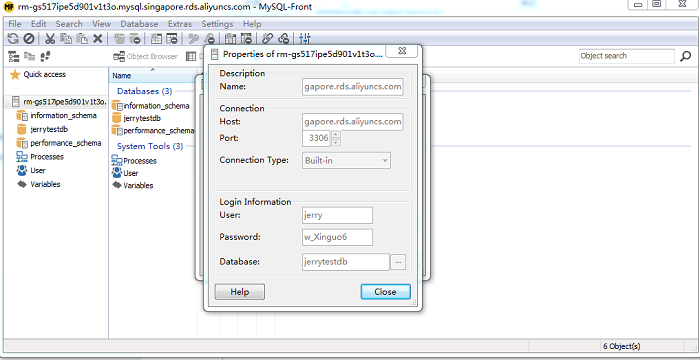
Select the desired database for logon, and log on to the temporary instance through database client, the following sample is screenshot with MySQL Front.
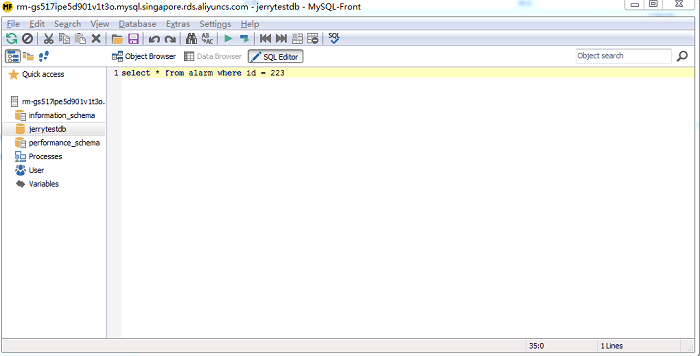
Step 5: Retrieve the data that was accidentally deleted through the SQL window.
Import the exported SQL to the master instance through MySQL Front or other tools to complete data restoration.