Deploying Nginx Servers Using Custom Images on Alibaba Cloud
Summary

Introduction
In this tutorial, we will learn how to set up Nginx on an ECS instance. The reason why we are doing this is to prepare ourselves to perform load balancing across multiple Nginx servers (this will be covered in another tutorial). Also along the way, we will discover security groups and creating custom images. The purpose of custom images is to make the process of setting up servers easily repeatable. Although these topics might seem disparate, they all link together, that much I can promise.
Prerequisites
You should have a working account on Alibaba Cloud and have some familiarity with ECS. Because this tutorial is quite involved, you should first check out other tutorials on the Getting Started page if you are new to Alibaba Cloud.
Setting up Nginx
Nginx is an open source reverse proxy/load balancer/http server. For the course of this discussion, we are just going to use the HTTP server features of Nginx. Why I choose Nginx in this initial setup, is because its so simple to setup, it does not take the attention away from the real topic of discussion.
• To get started, deploy a small ECS instance with at-least 1Mbps bandwidth using a Ubuntu image from the Public Images in ECS. If you need help with doing so, use the Getting Started document mentioned in the previous section.
• Once you have the image do an ssh to the image using root credentials.
• Then run the following commands to update the OS repository and install Nginx.
apt-get update

apt-get install nginx -y

sudo /etc/init.d/nginx start
Open your browser and access the Internet IP of your ECS instance. Can't access your web server? Don't fret. There is a reason for that. By default only SSH, ICMP and RDP ports are open on the firewall rules for the Internet-facing interface of ECS. In order to access your webserver on the Internet, you need to open port 80. Go through the following set of steps in order to open port 80 on your ECS instance: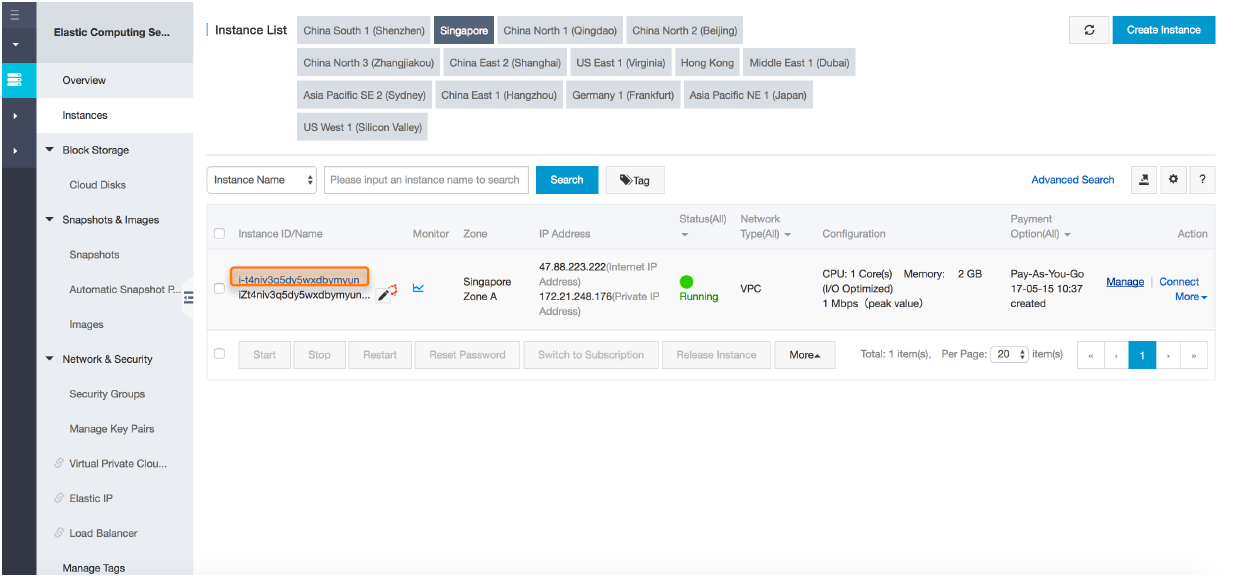
Click on the instance Instance-ID as highlighted above. This should bring you to the following screen: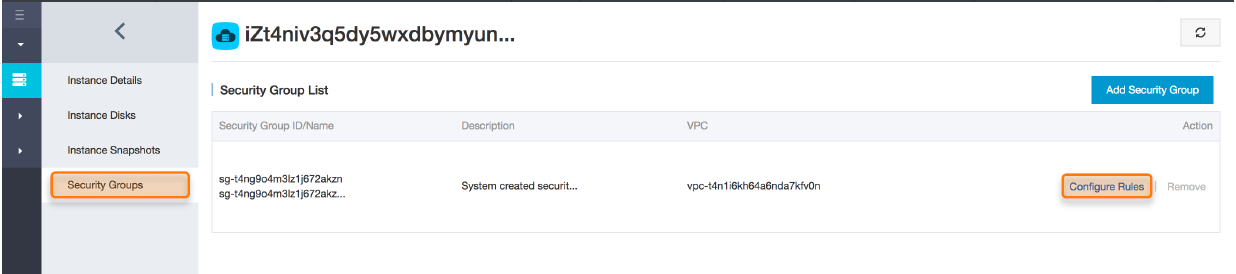
Ensure that you have clicked on Security Groups on the left panel as highlighted above. Security Groups are like “firewall rules” that you apply to your ECS instances to control inbound and outbound traffic.
Click on Configure Rules to add the http access rule to allow traffic on port 80 from the Internet: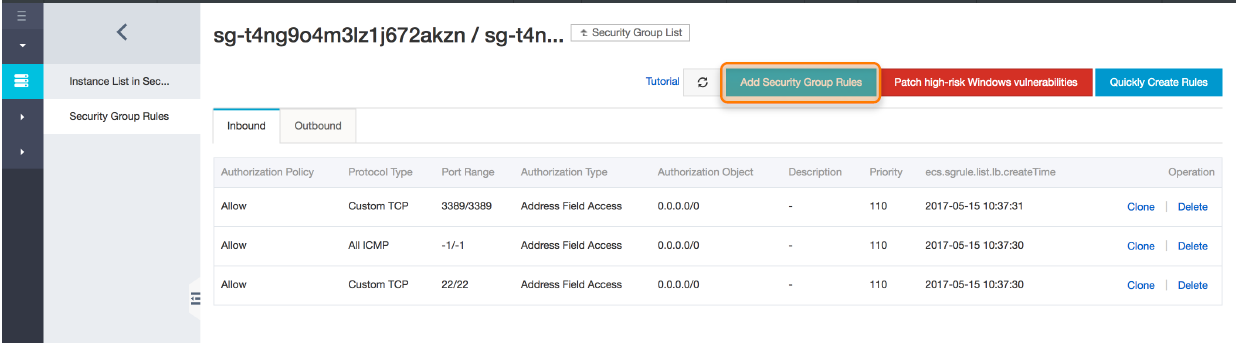
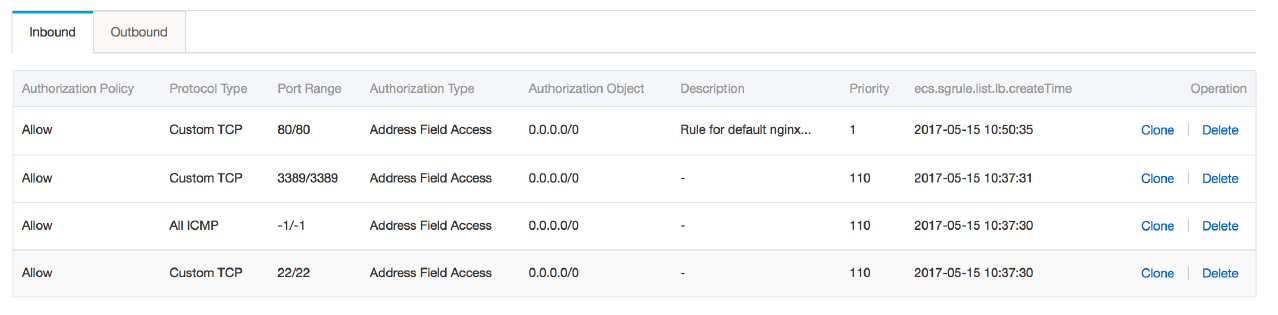
As you can see above there are three rules defined above that allow traffic for ICMP ping, ssh(22) and RDP(3389.) We need to define a fourth rule to allow incoming traffic on port 80, which is the HTTP port Nginx is listening on. Click on Add Security Group Rules as highlighted above.
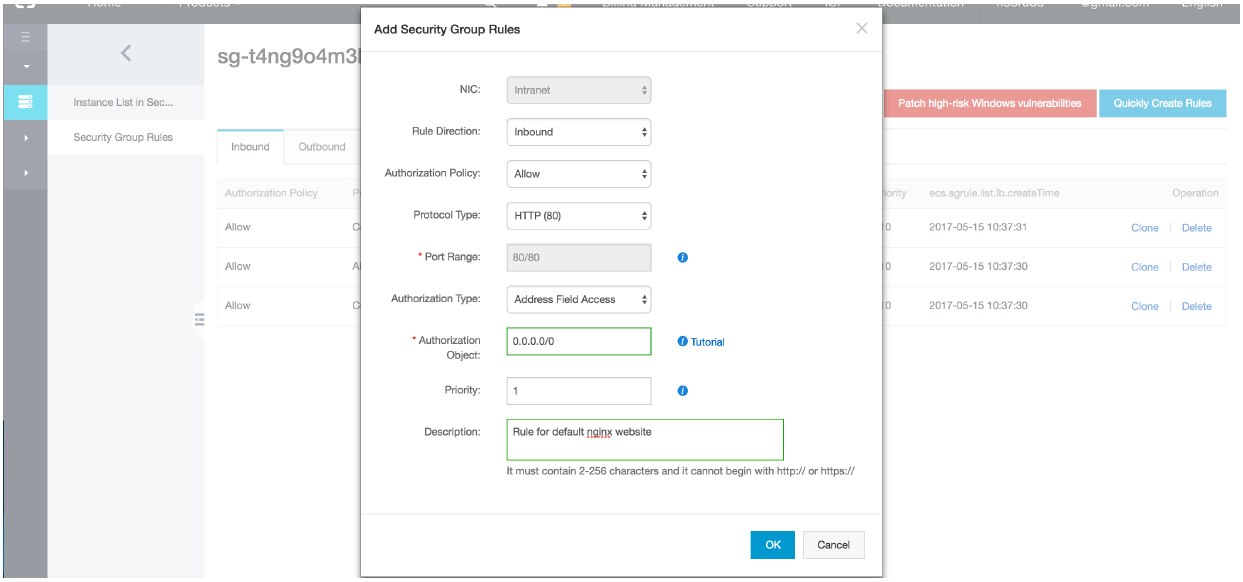
The above pop-up allows you to build the rule. The table below describes the purpose of each rule:
|
Field |
Description |
Value |
|
NIC |
The Network Interface you are creating this rule for. In our case, we are creating for the Internet facing interface. |
Internet
|
|
Rule Direction |
The traffic direction (inbound or outbound) for which this rule is applied to. |
Inbound |
|
Authorization Policy |
Determines whether the rule allows traffic (Allow) or denies it (Deny). |
Allow |
|
Protocol |
The protocol of the traffic (TCP, UDP, HTTP, etc.) |
HTTP |
|
Port Range |
The range of Ports of which the rule will be applied to. |
80/80 (Means port 80 only) |
|
Authorization Type |
Address Field Access: Allows access to/from a range of IP addresses. Security Group Access: Allows access to/from all instances inside a particular Security Group. |
Address Field Access |
|
Authorization Object |
Can be a CIDR for a range of IP addresses to/from traffic is being allowed. It can also be the name of a Security Group. |
0.0.0.0/0 (To allow anyone to access our webpage) |
|
Priority |
Rules with lower numbers have higher priority. |
1 |
|
Description |
Readable and user-friendly description of the rule. |
Rule for default Nginx website |
Once you are done entering all the values, press OK and access the Internet IP for your ECS instance on your machine and you should see something similar to the screenshot below:

Congratulations! You have set up your very own web facing Nginx in Alibaba Cloud.
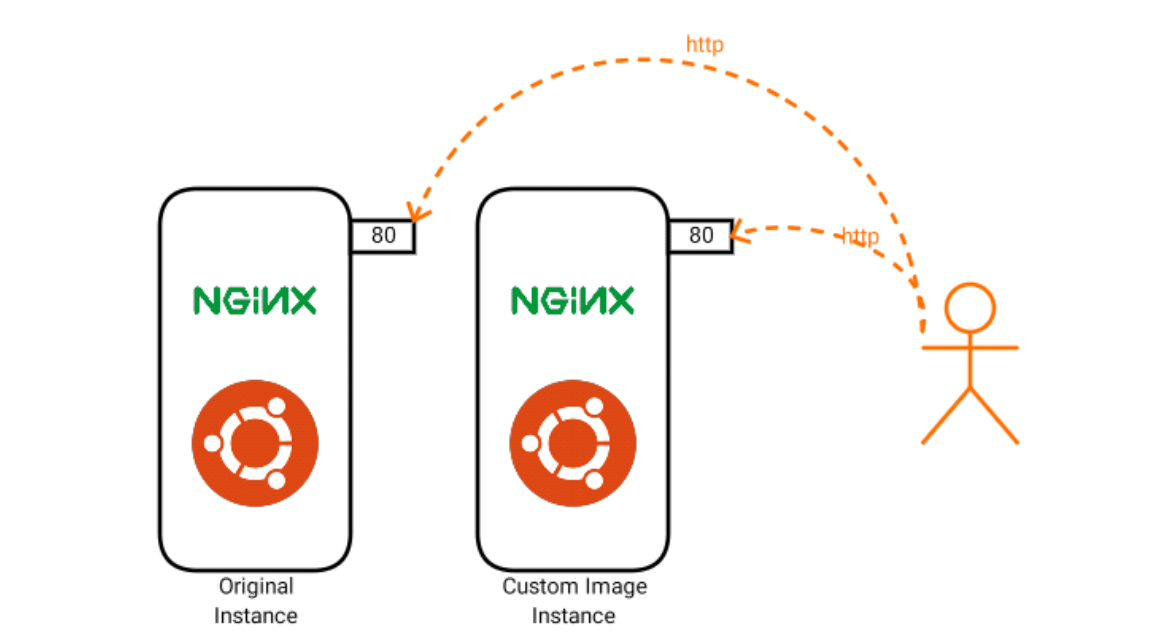
Creating a Custom Image
Wouldn't it be nice if we could just save all the work that we did to setup the Nginx instance? And we could just do a one-click deploy of Nginx the next time we wanted an Nginx server!
This is possible with Custom Images. What Custom Images allow you to do is to save the state of an existing instance along with the application deployed, and then launch a new instance from that configuration. This is very useful if you want to deploy multiple instances of the same application, perform load balancing, or perform auto scaling.
Run through the following steps to create a custom image using Ubuntu and Nginx:
Make sure that you are on the Instances list under ECS as highlighted in the left panel above:
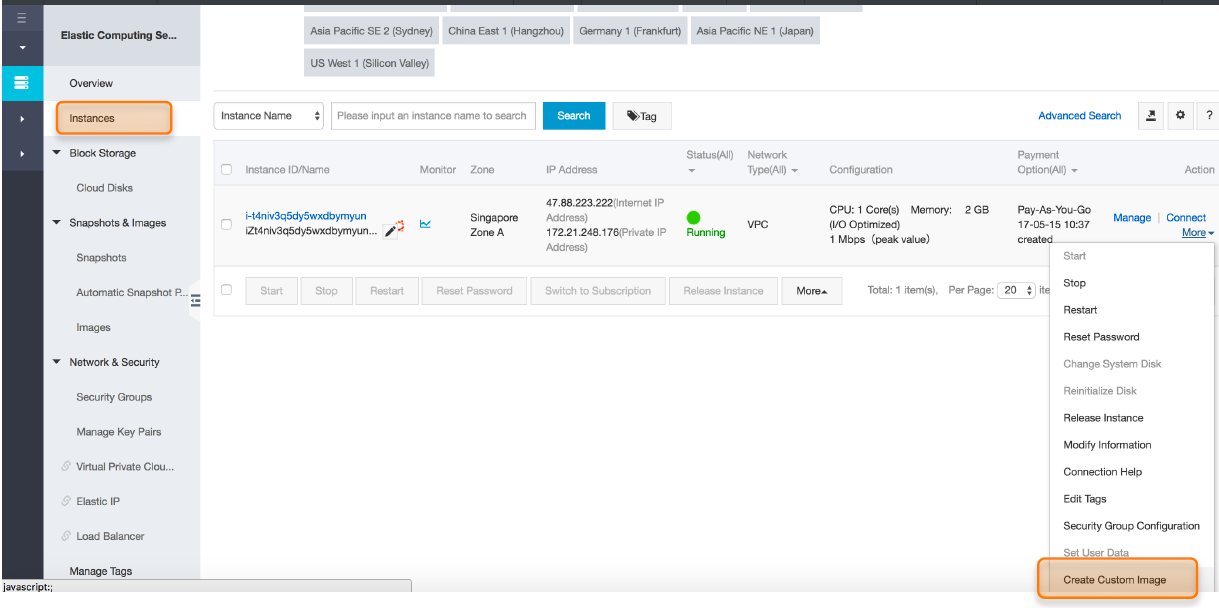
• Go to your instance in the instance list and press More on the very right.
• Select Create Custom Image from the dropdown as highlighted above.
• Enter a name and description for the image and click Create.
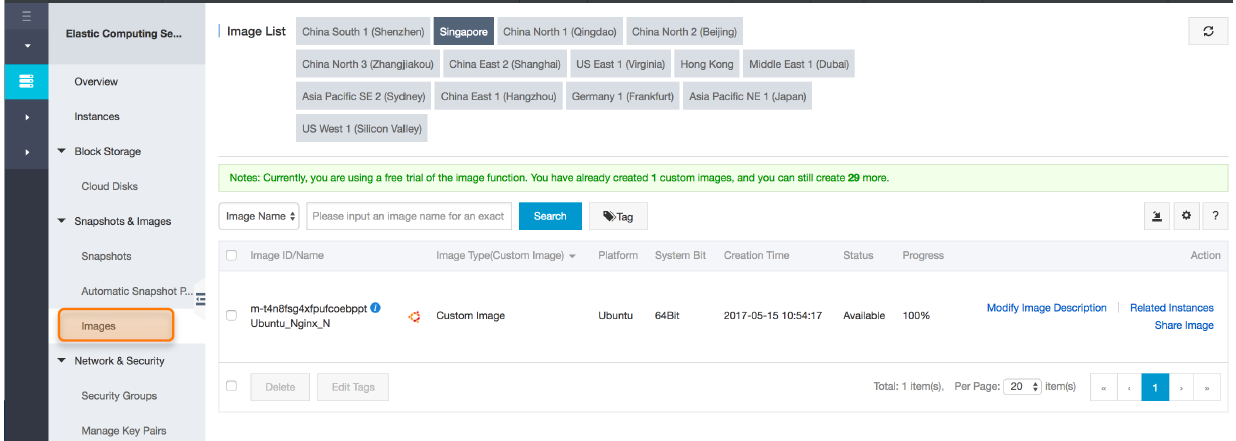
Go to Images on the left hand panel under Snapshots and Images as highlighted above. Wait for the status of your image to turn to Available.
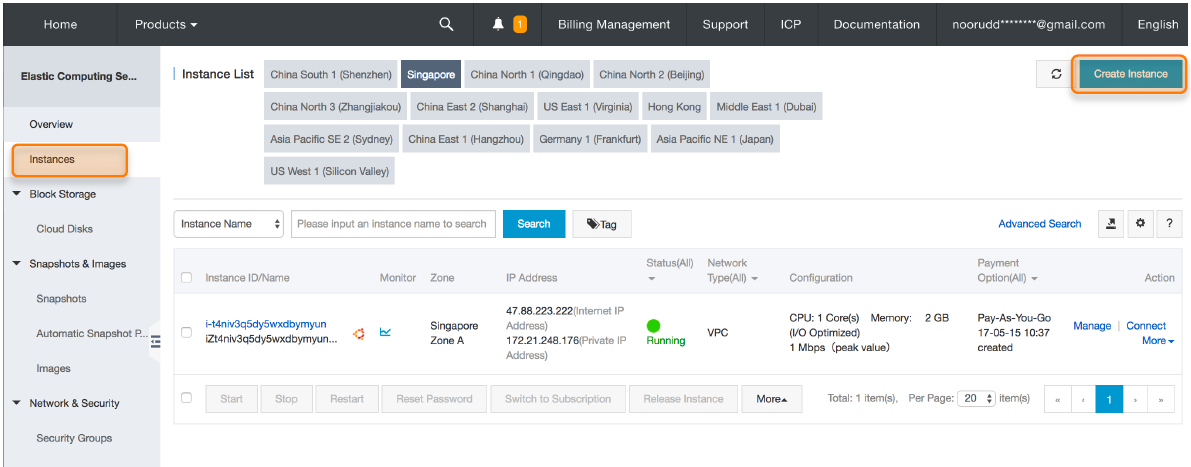
Go back to Instances as highlighted above in the left panel. Click on the Create Instance button. Go through the following screens to create a custom Image:
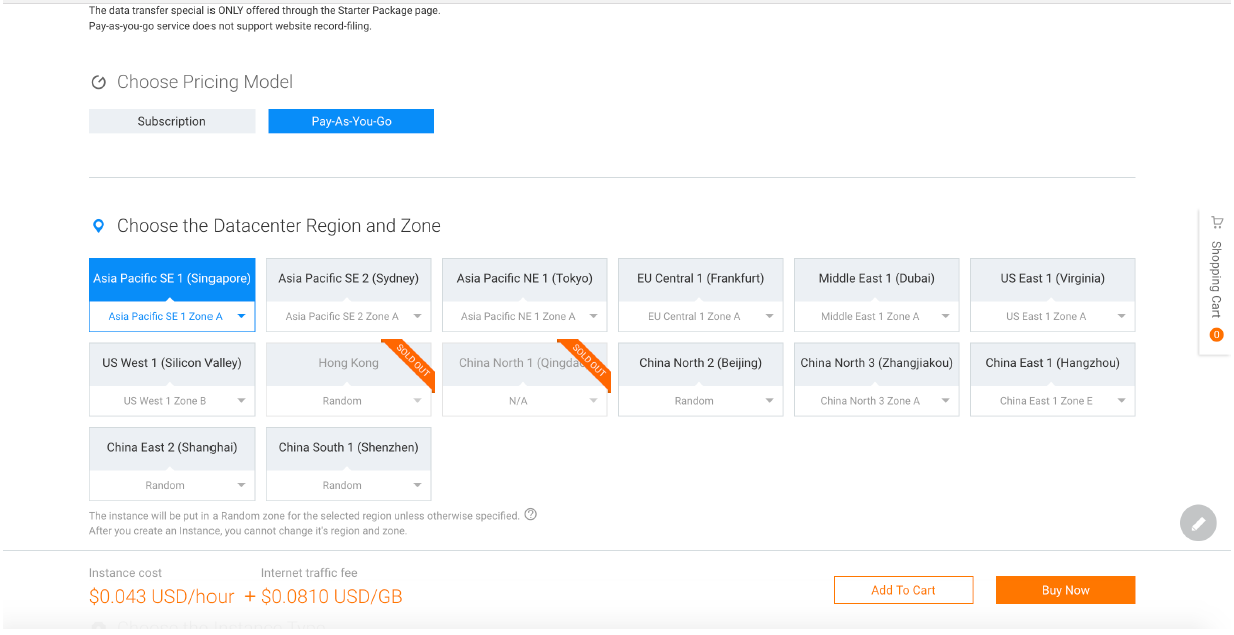
• Pricing Model: Pay-As-You-Go (or Subscription, which ever you like)
• Datacenter Region and Zone: Singapore (Or something else)
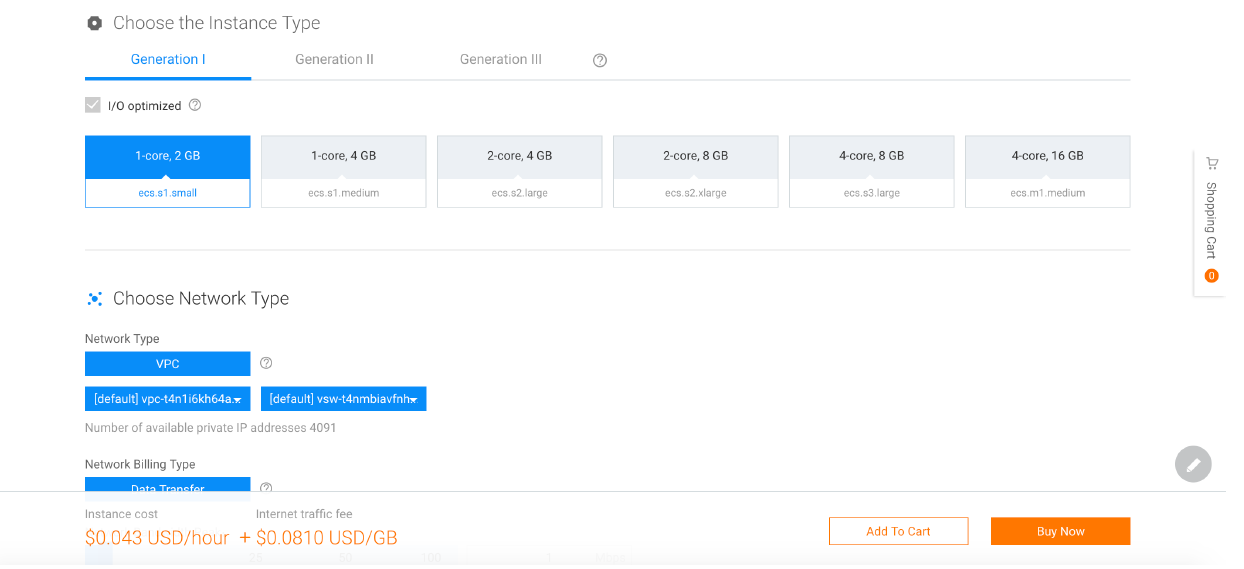
• Instance Type: Select a small instance. I chose ecs.s1.small
• Network Type: VPC (With default VPC and Switch selected. The switch might not be selected by default so make sure to select it)
• Network Billing Type: Data Transfer
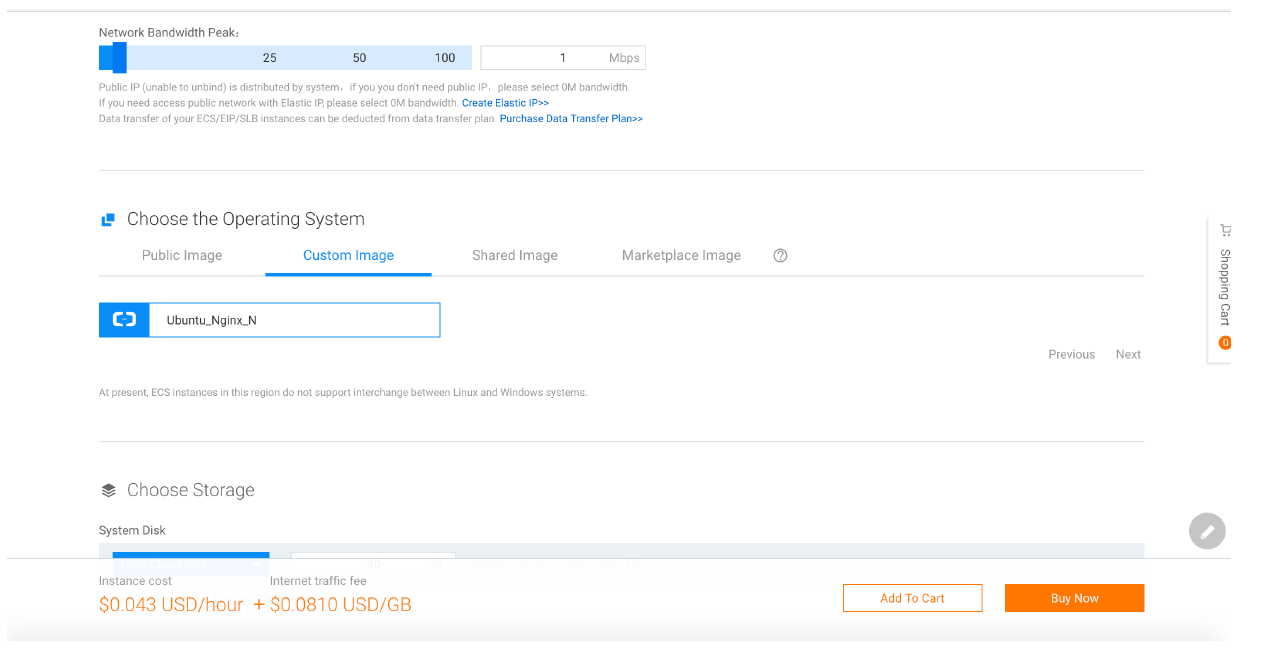
• Network bandwidth Peak: 1 Mbps should be enough. Make sure its not 0 Mbps otherwise the instance will not be accessible from the internet and you will not be able to access internet from inside the instance.
• Operating System: Go under Custom Images and select the custom image that we just created in the previous steps. For me it is Ubuntu_Nginx_N.
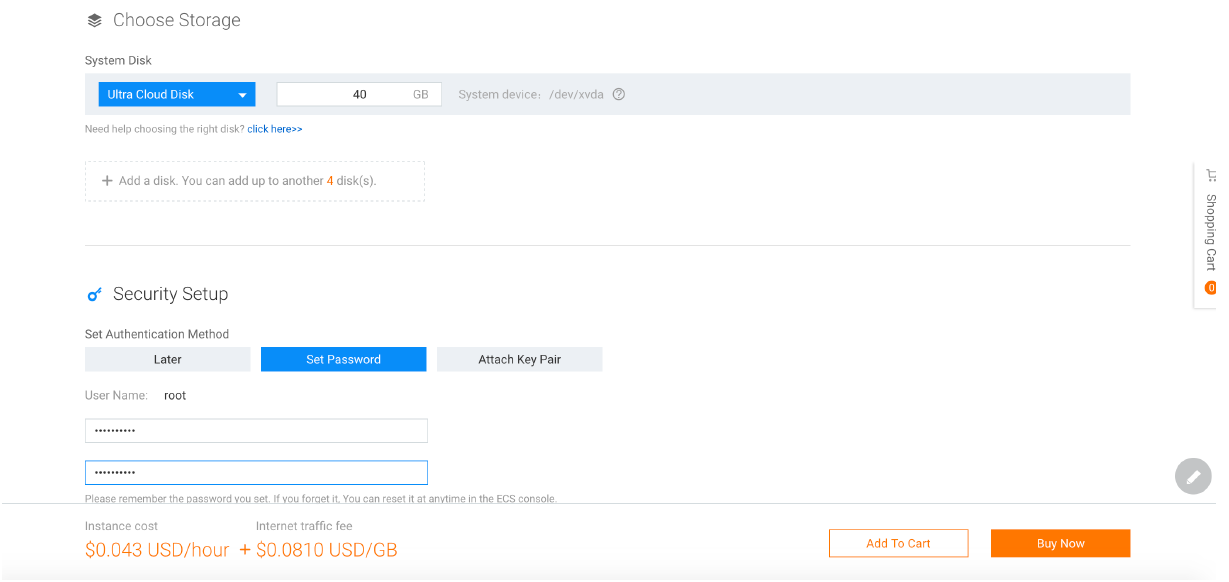
• Storage: Ultra Cloud Disk 40 GB should be enough.
• Security: Set the Password, just to see how it works.
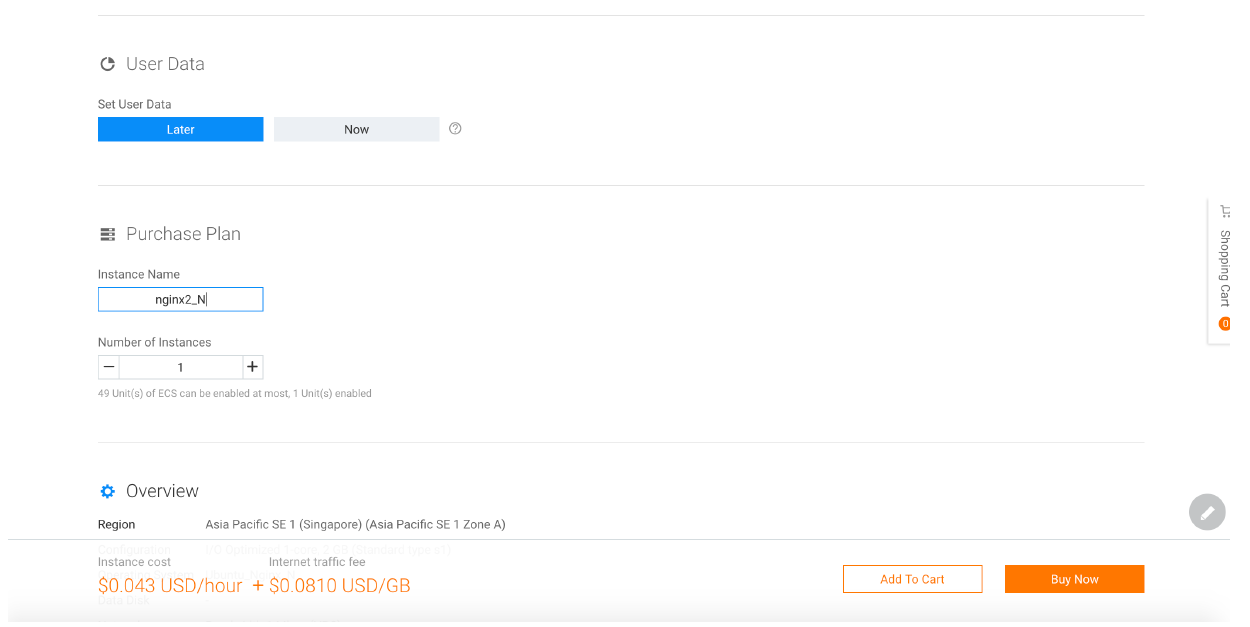
• User Data: Leave it for Later
• Instance Name: Give it a name just for kicks. I gave it nginx2_N
• Number of Instances: 1
Now press Buy Now. This will lead you to the purchase confirmation page below:
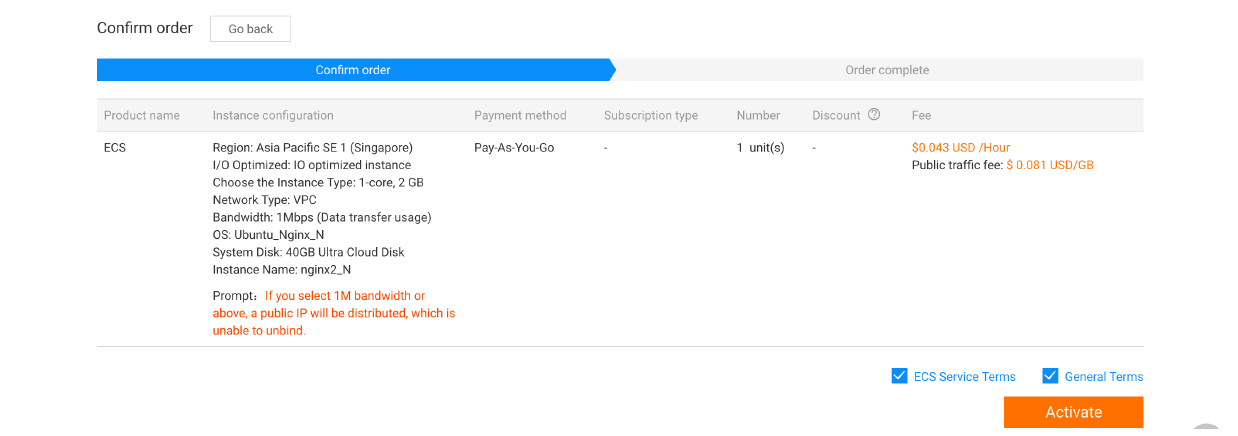
Press the Activate button to complete the purchase and then go back to the Instances page in the console.
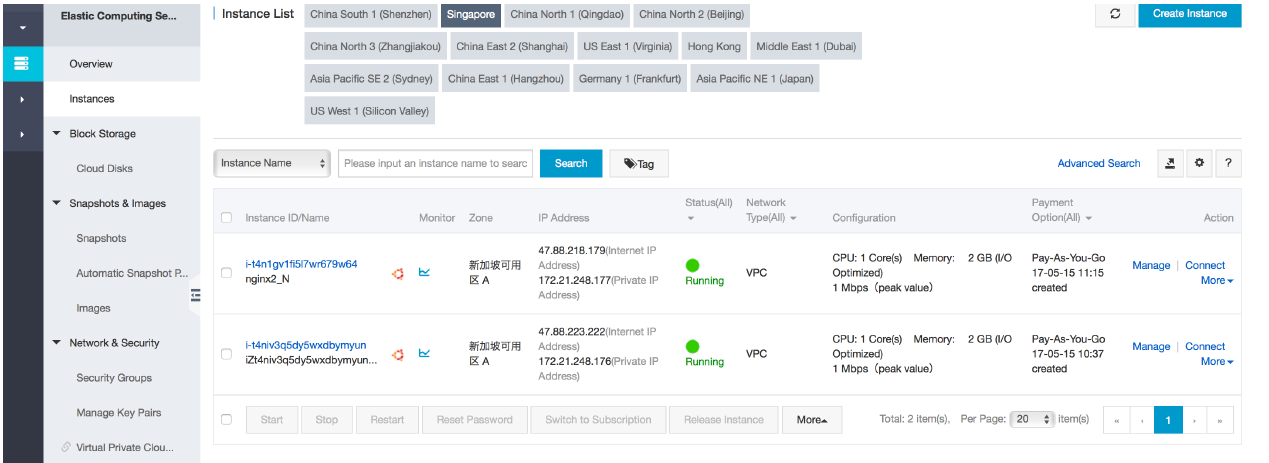
Wait for your new instance to get to Running state.
Note: Since this instance belongs to the same default security group, there is no need to open port 80 as it is already opened as shown in the Security Group page above.
Use the following command to ssh in to the new instance:
ssh root@NEW_INSTANCE_INTERNET_IP
Once logged in, run the following command to make sure that Nginx is actually installed and running:
sudo service nginx status
If all goes well you should receive an active (running) status response.
Open your browser and point it to the Internet IP of your new instance. You should see the screen below:

So lets do a quick recap. What have we done so far?
• We took an Ubuntu Instance and installed Nginx on it.
• We adjusted firewall rules to make sure that we could access the Nginx via the web on the Internet
• We tested that it works
• We then created a custom image from this instance so we don't have to install Nginx every time we need a new instance of Nginx.
• We used this custom image to launch a new instance. We noticed that the new instance takes its own IP, Hostname and Password attributes, however it retains the Nginx installation.
• We tested that Nginx indeed works on the new instance.